The Height and Supports Tab (Vertical Members)
The Height and Supports tab is used to enter height and connector information for vertical members (wall studs, wall columns, free standing posts).
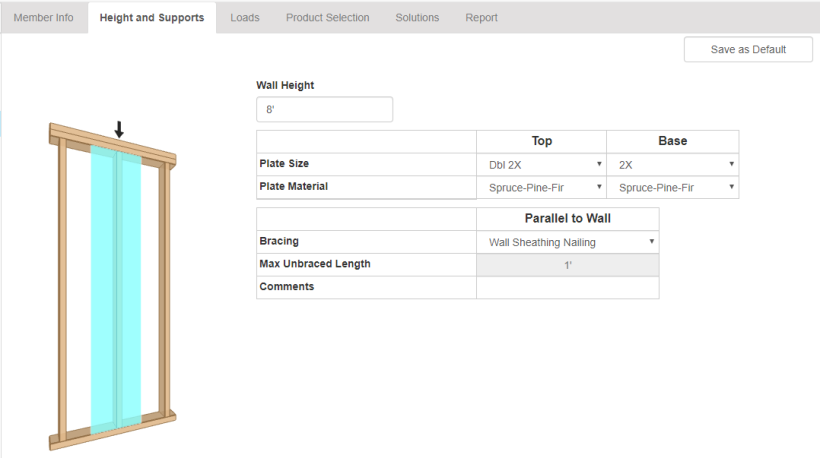
Entering Height and Supports information for wall studs and wall columns:

Enter the overall height of the wall, then enter the plate information for the top and base. The member height will be adjusted minus the thickness of the top and base plates. The plates are checked for crushing.
Connectors can be selected on the Report tab.
Bracing Options
Wall Sheathing Nailing: Assumes bracing every 1'-0" to represent wall sheathing nailing.
Fire Blocking: Assumes bracing every 8'-0" to represent the installation of fire blocking.
Full Member Height: Assumes the full height of the member is unbraced.
Custom: Allows you to enter a specific spacing not accounted for by the other options.
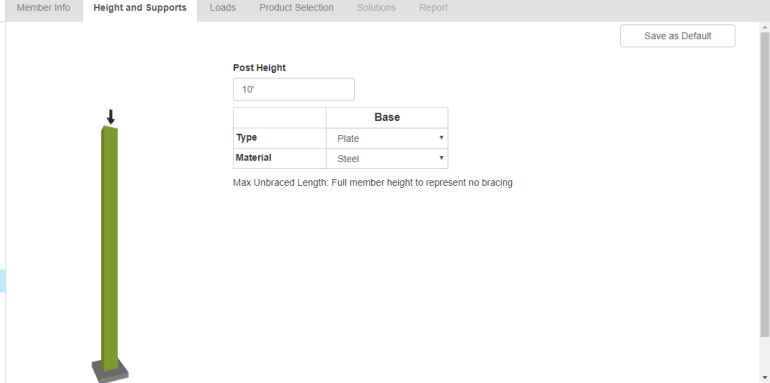
Entering Height and Supports information for free standing posts:

Enter the actual height of the post and indicate the base support material. The support material is checked for crushing.
A list of bearing values for support materials can be found in the Support Materials Bearing Values topic.
Connectors
Wall embedded members resist lateral wind load on the face of the wall. Lateral connectors will be sized based on wind load, wall geometry and wood species. For more information, see the Connectors: Vertical Members topic.
Support Material
The availability of support materials depends on whether a support is bottom or flush, and on the support type. For example, a stud wall as a bottom support offers only TimberStrand® LSL as an option because you can use this material as a wall plate, but a flush support using a beam support type offers the entire Weyerhaeuser® SCL product line as support material. Depending on the member selections, the options are:
- TimberStrand® LSL
- StrandGuard® LSL
- Parallam® PSL
- Microllam® LVL
- Glulam
- Hem Fir
- Southern Pine
- Doug Fir
- Spruce Pine Fir
Save as Default
At the top right of this tab is the 'Save as Default' button that will save will save all the displayed settings as default settings for future jobs.
You can return to your original settings by going to User>Settings and clicking on the Reset All Job Defaults button. This will reset all your saved defaults for each Member Type as well as your Job and Level Settings. This command will NOT affect any settings shown in the Settings dialog.