The Location Analysis Tab
The Location Analysis tab provides analysis at specific locations along a member and provides guidance when a joist is inadvertently notched after installation.
Location Analysis allows you to choose points, or locations, along the span of horizontal members so that shear and moment design and capacity values at the specified locations are returned. Location analysis does not influence the pass/fail status of any product. Location analysis results are provided as optional and additional information only.
Notch Analysis allows you to determine the integrity of a joist that has been compromised by damage to the top or bottom flanges after it has been installed. Notch analysis results will be displayed in a grid on the member report along with the pass/fail percentage for the selected product. Additionally, a graphic will be displayed at the end report that will display the dimensions on this tab.
Entering Location Analysis Information
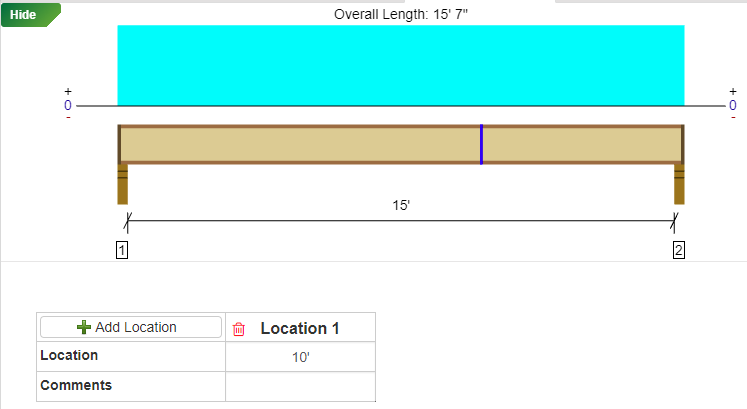
You can enter location analysis points on a single member. The results display in the Output report.
To add a location, click the Add  icon, and then enter Location and Comments (optional).
To delete a location, select the Delete  icon in the column you want to delete.
To view the member graphic, select the

Location analysis points that aren't located on the member are ignored during design.
Location analysis points located on rim board either at end-bottom supports or on the end-support beams of flushed-end supports are ignored. Finite element analysis does not design these items, so no meaningful solution is returned.
There is no limit to the number of location analysis points that you can enter.
Repeated locations are allowed.
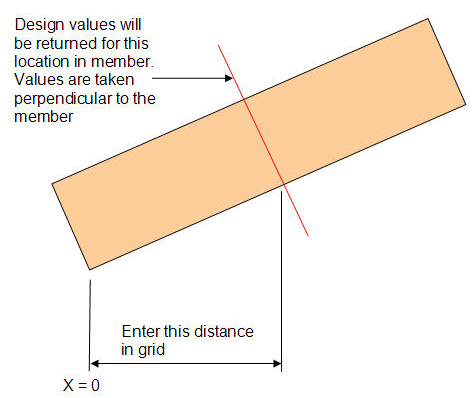
Location analysis points in a pitched member are measured along the horizontal projection. The results returned back for this location will be taken at a line perpendicular to the member.

Entering Notch Analysis Information
Notch analysis is only available for Floor Joist member types, only one notch is permitted per member, and only for Residential applications.
To add a notch, select the Add icon in the notch grid displayed below Location Analysis. Selecting the Type in the dropdown will update the image displayed to the right to assist in input. Once notch information is entered, hatching will display on the member graphic. Note: this is for informational purposes only and is not intended to represent the actual size of the notch.
To delete the notch, select the Delete icon.
icon.
Notch will only be allowed in a TJI® joist member of one ply.
TJI® product can only have one notch per joist member.
Notch will only be analyzed when the length parallel to the joist member span does not exceed 4 inches.
Notch will only be analyzed when the total cross-sectional ratio, of notch to flange area, is less than or equal to 50%.
Notch will only be allowed in a non-sloped TJI® joist member.
For more information, see the Rules for Notches topic.
Location Shorthand
For easier dimensioning when entering a location, you can use the following shorthands to reference various places along the member:
-
R to reference the right end of the member. Enter R - (minus sign) and a distance to specify a location from the outside face of the right support (or right cantilever end).
-
Support number to reference a support. Enter support number - (minus sign) and a distance to dimension from the left face of that support, or support number + (plus sign) and a distance to dimension from the right face of that support.
-
Support number and | (pipe) to reference the center of a support. For example, "2|" would reference the center of support 2. Or you can offset a distance by adding +/- and the distance depending on the direction.
-
M or C to reference the center of the member. Enter M or C alone or add +/- and the distance to offset from the center of the member. So, entering "C + 2.5" would give you the center of the member plus 2.5".
Check out this Location Shorthand video for more information.